Menu
Table of contents
So I'm happy to help you with that now!
In 10 steps to create an IP address filter in Google Analytics 4
Step 1: Go to the Google Analytics website and log in.
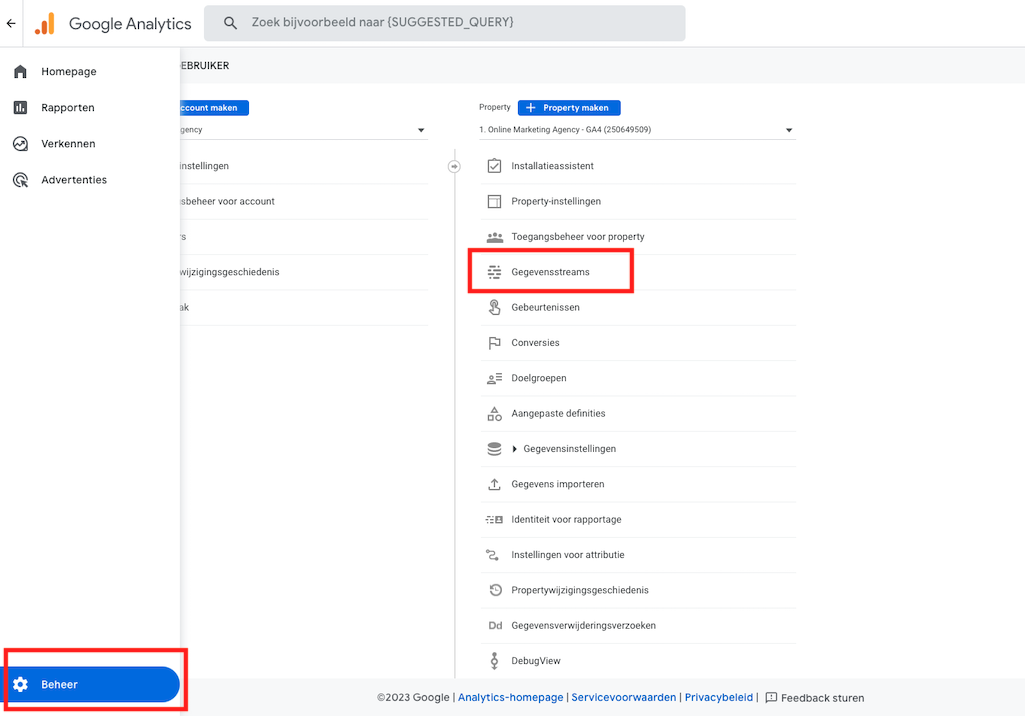
Step 2: At the bottom left, within the property where you want to add the IP address filter, click on the cogwheel (management).
Step 3: Click on "Data Streams" and then on the data stream you are using.

In our case, of course, that's Online Marketing Agency's stream which can be seen below.

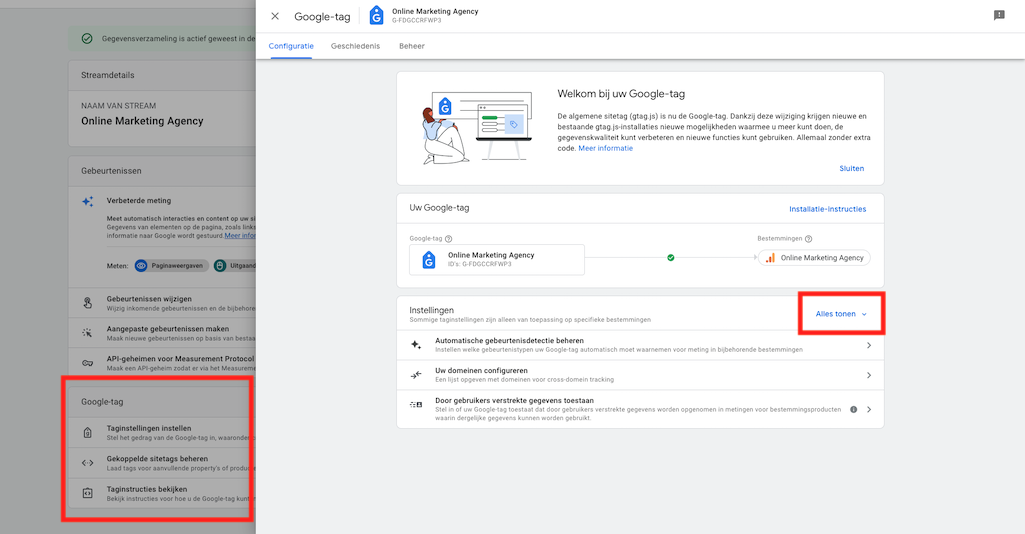
Step 4: At the bottom, click "Set Tag Settings" and then "Show All.

Step 5: Click "Define internal traffic.

Step 6: Click the blue "Create" button.
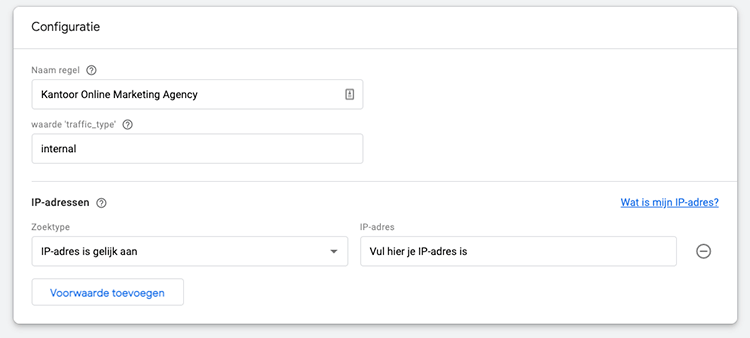
Step 7: Enter the name of the location you want to filter and enter the IP address is.

Step 8: Click "Create" at the top right.
The filter has now been created! Now we just need to activate it. You can do that by going through the following steps.
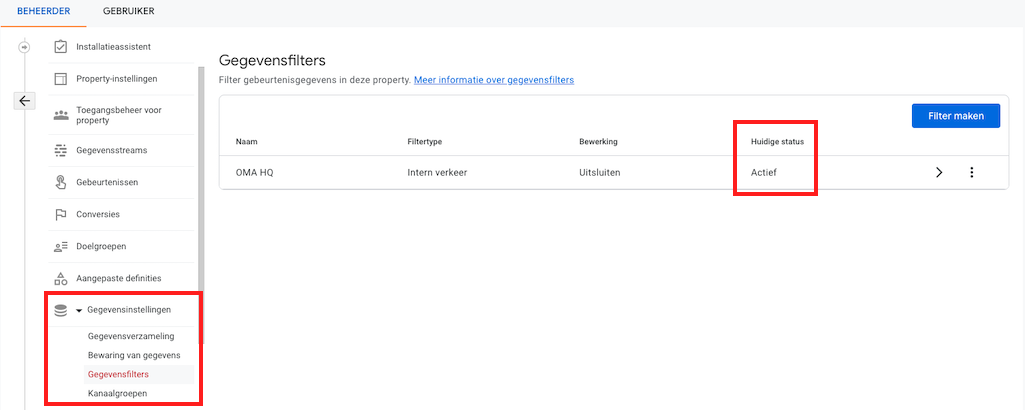
Step 9: Under "Data Settings," click on "Data Filter" and then the filter you see there.

Step 10: set the filter status to 'Active' instead of 'Testing' and you're done!

And more
Since I think you'll want more helpful tips and tutorials on Google Analytics 4, I've listed them all here for you.
- Loading Google Analytics 4 with Google Tag Manager
- Adding someone to Google Analytics 4
- Setting up Site Search for Google Analytics 4
- Click to make phone number & mail address measurable with Google Analytics 4
- Making thank you page measurable with Google Analytics 4
- Linking Google Analytics 4 with Google Ads
- Google Analytics 4 import conversions into Google Ads
- Linking Google Data Studio with Google Data Studio


Written by: Daniel Kuipers
Daniel is the founder of Online Marketing Agency. He constantly scours the Internet for the latest gadgets and tactics and blogs about them in understandable language. Well, sometimes.