Menu
Table of contents
Installing Microsoft Clarity
Before you start installing Microsoft Clarity, it is useful to check the speed of your website. How to do that, we explain here.
Installing Microsoft Clarity is easiest via Google Tag Manager (GTM). To do this, however, you must have Google Tag Manager already installed on your website. Don't know how to do that? Don't worry, you can read about it here.
To further install Clarity, we need Cookiebot. How to install this we explain to you here. In doing so, create a trigger for 'Cookie Consent Marketing'. You can do this by adding a new trigger. You select the trigger type on 'custom event' and you can activate the trigger on all custom events.

Have you linked GTM to your website and created the trigger for Cookie Consent Marketing? Then you can proceed to the step-by-step process below:
Step 1: Create Account
Start by creating an account with Microsoft Clarity. Visit the Clarity website and click the button to register. Then follow the instructions to set up your account.
Step 2: Add a new project
Once logged into Clarity, add a new project in the upper left corner. This is your first step toward collecting data about your website.
Step 3: Enter the name and website URL
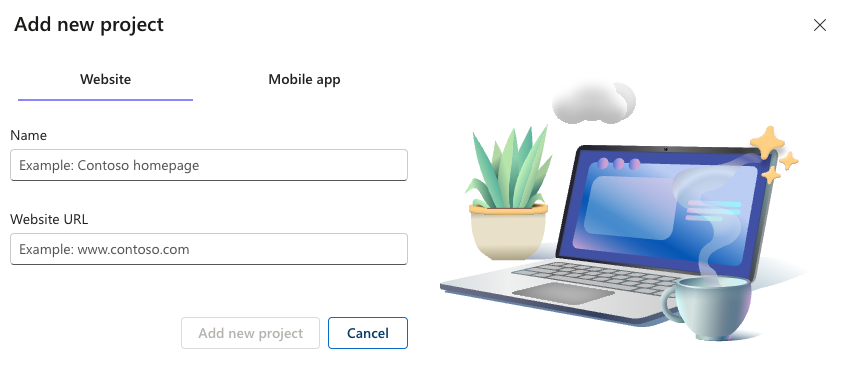
On the new project screen, enter the name of your project and the URL of your website. Then click "Add new project" to continue.
Step 4: Copy the tracking code
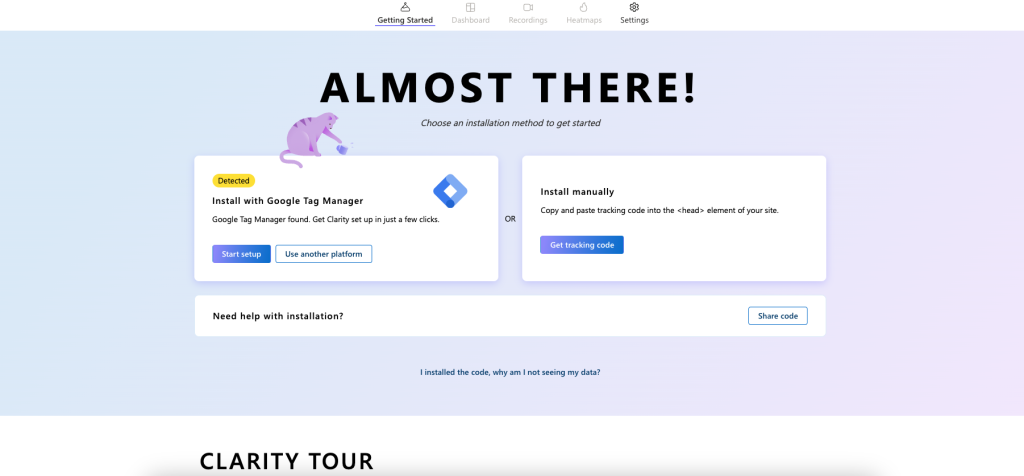
After adding your project, Clarity generates a unique tracking code (Get tracking code). Copy this code; you will need it for the next steps.
Step 5: Open Google Tag Manager
Next, open Google Tag Manager and log in. Next, select the domain for which you would like to set up Clarity.
Step 6: Add a new tag
Within Google Tag Manager, go to "Tags" and click "New Tag" to add the Microsoft Clarity tracking code to your website.
Step 7: Name the tag
Give your new tag a name. Make sure this is a name that is easily recognizable to yourself, for example, "Microsoft Clarity."
Step 8: Set the tag type to 'Custom HTML'
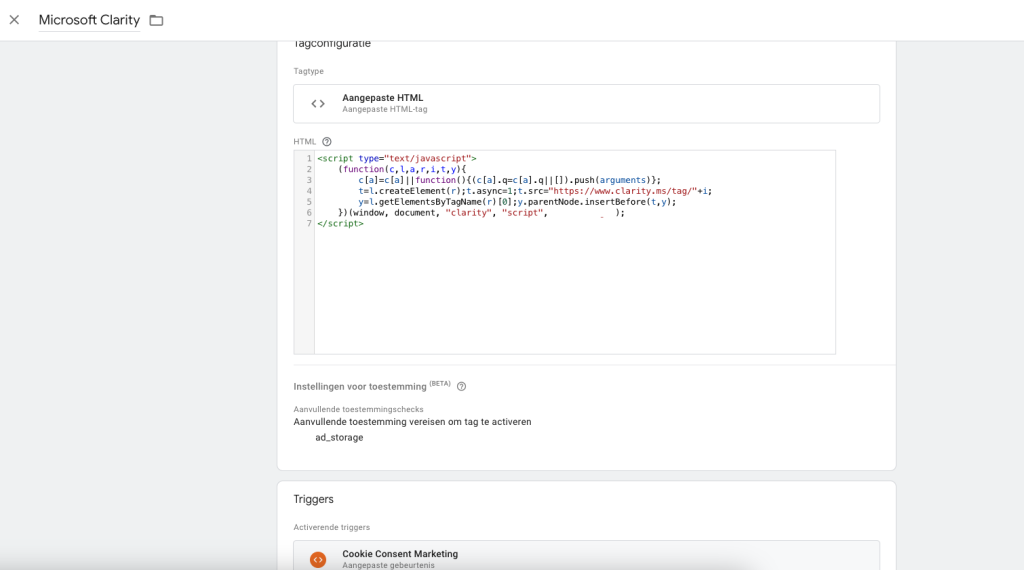
Select "Custom HTML" as the tag type and paste the tracking code you copied earlier into the HTML box.
Step 9: Set the trigger to Cookie Consent Marketing
At the bottom of this page, choose the "Cookie Consent Marketing" trigger setting. This will only load the Clarity tracking code on each page of your website once the marketing cookies have been accepted.
Step 10: Set the permission to 'ad_storage'
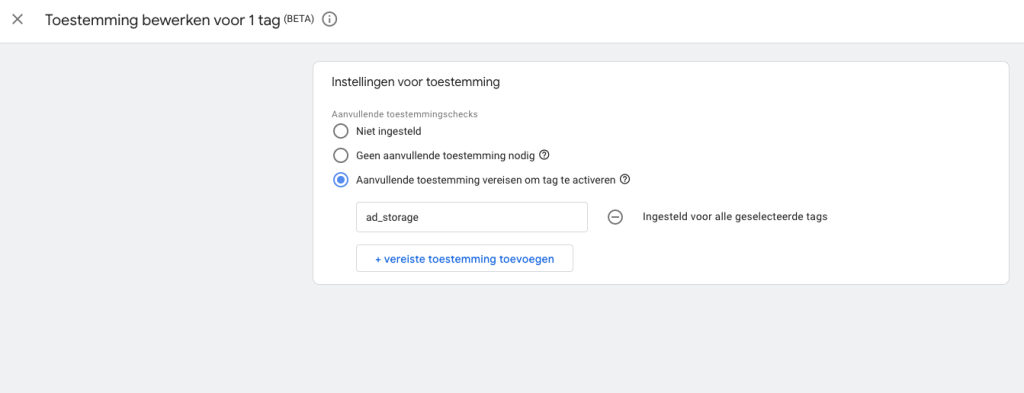
Go to the permission overview and select Microsoft Clarity. Go to the settings and set the permissions to "Require additional permission to activate tag.
Step 11: Send the changes
After you've set up the tag and trigger correctly, it's time to publish the changes. Click "Submit" to put your new configuration live.
Step 12: Open Clarity
In Clarity, go to your account settings. And hit "ip-blocking.

Step 13: Block your IP address
Click on "+ block IP address. Enter a recognizable name and enter your own IP address here. This ensures that if you yourself are on the website, this will not be counted in the data. How to find your IP address is explained here.
Step 14: Check the speed of your website
As a final step, check the speed of your website again. See if using Clarity isn't having too much of an impact. Is that the case? Then you might want to remove it from your website again and optimize your website for faster loading time first.
And that was him already! Very easy! Keep in mind that it can take up to two hours before the first data is visible and you can use Microsoft Clarity!




Written by: Ellen Prinsen
Ellen is a marketer at OMA. Thanks to her fresh look, this sleuth always finds clues to make your campaign or website even better. Sherlock is nothing like it.