Menu
Table of contents
So I'm going to help you with that now.
Important before you start: in this article, we explain how to load a completely new Google Analytics 4 via Tag Manager. Should you want to upgrade your current Analytics to GA4, go directly to the bonus at the bottom of this article.
Google Analytics 4 account creation in 8 steps
To load Google Analytics 4 via Tag Manager, you first need Google Analytics 4 and Tag Manager.
Let's start by creating a Google Analytics 4 account.
Step 1.1: Go to the Google Analytics website and log in with your Google account.
Step 1.2: Click on the cogwheel at the bottom left, then click on "create account.
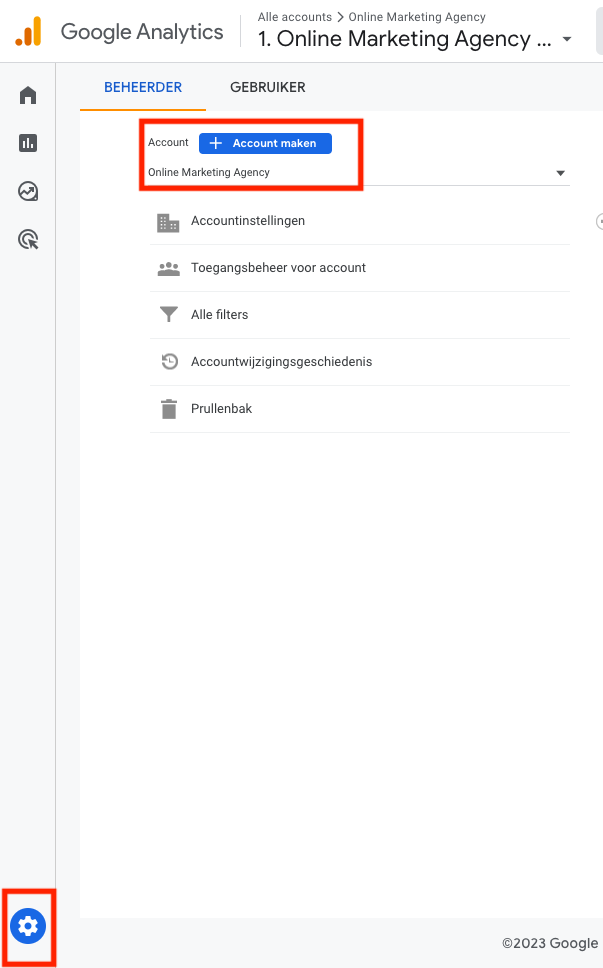
Step 1.3: Enter the account name, leave the 'Technical Support' option on and click 'next'.
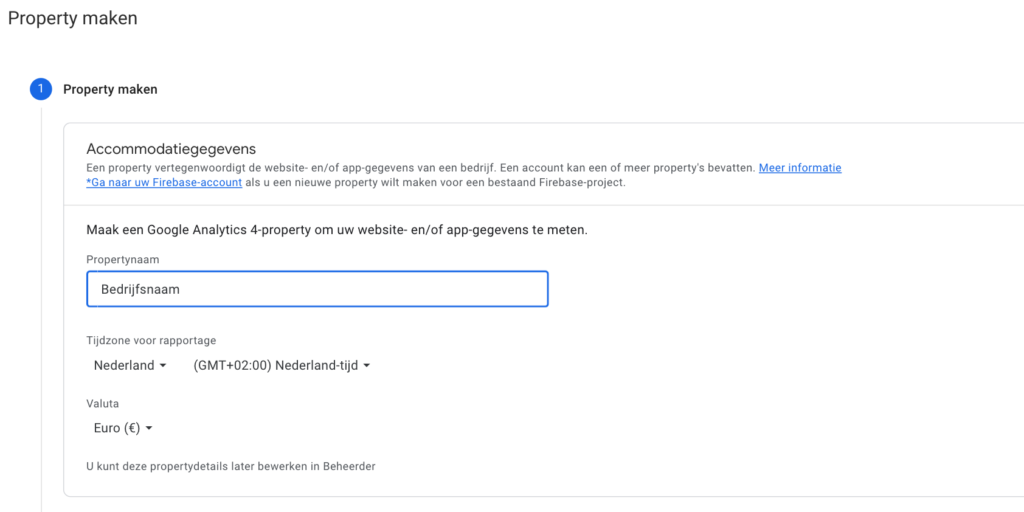
Step 1.4: Enter the property name, select the appropriate currency and time zone and click 'next'.
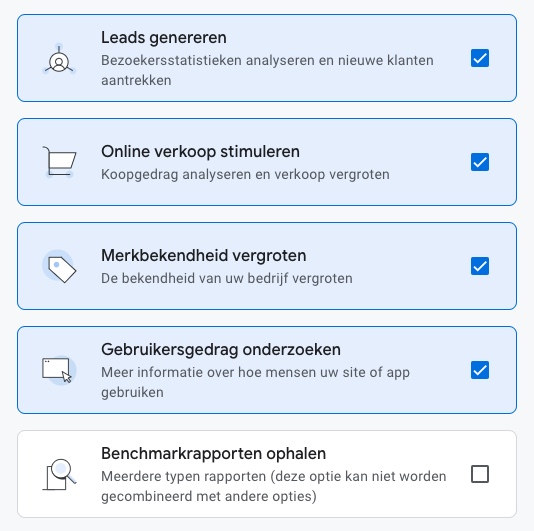
Step 1.5: Select the industry, check your company size and how you want to use Google Analytics.

Step 1.6: Click on "create.
Step 1.7: Click on 'web' and then enter the website url and the name of your website.
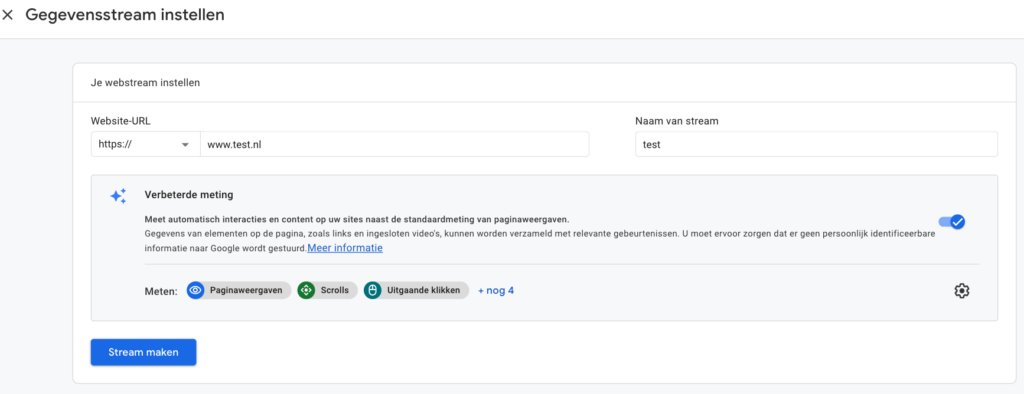
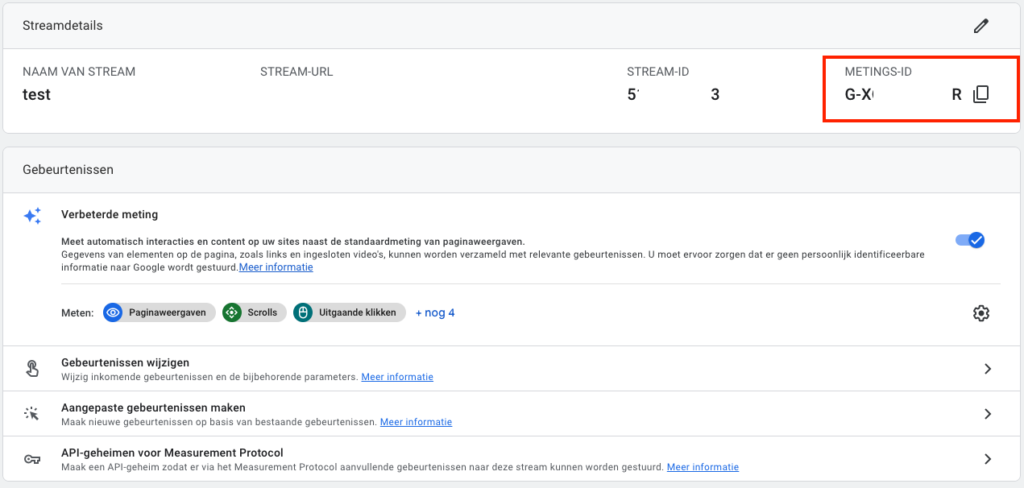
Step 1.8: Copy the measurement ID that appears in the upper right, we will need it later.
Google Tag Manager account creation in 5 steps
Now that we have Google Analytics 4 we have created, move on to Tag Manager.
Step 2.1: Go to the Google Tag Manager website and log in with your Google account.
Step 2.2: Click "create account" at the top right.

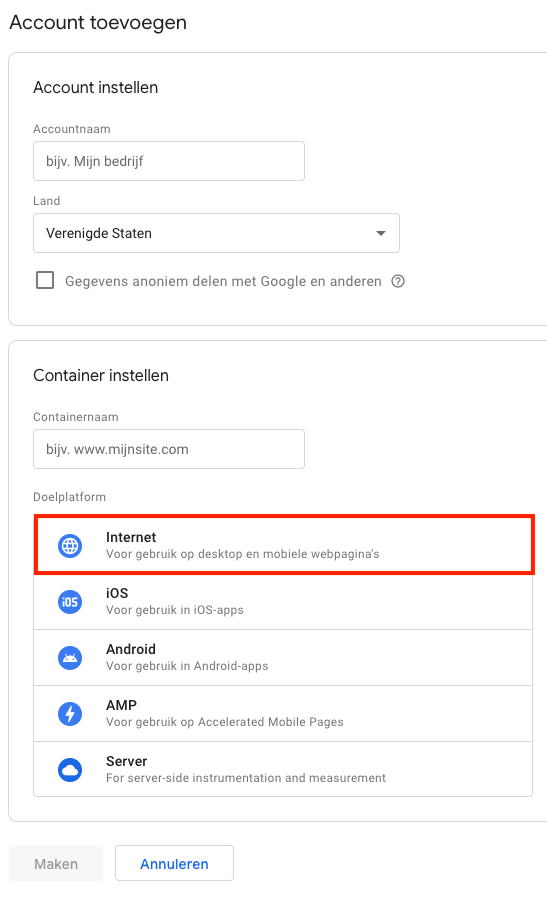
Step 2.3: Enter your account name, country and container name and select 'internet' under target platform.
Step 2.4: Click on "create.
Step 2.5: Copy the Google Tag Manager scripts and place the scripts in the appropriate place within your website.
Note! Posting the scripts can be done in several ways. My advice is to make sure you have a developer watching you during this step. A lot can go wrong here.
Google Analytics 4 loading via Google Tag Manager in 7 steps
The Google Analytics 4 account is ready and Tag Manager is ready. Now we are going to load Analytics via Tag Manager. And you do that as follows:
Step 3.1: In Tag Manager, click on 'New Tag' at the top left.
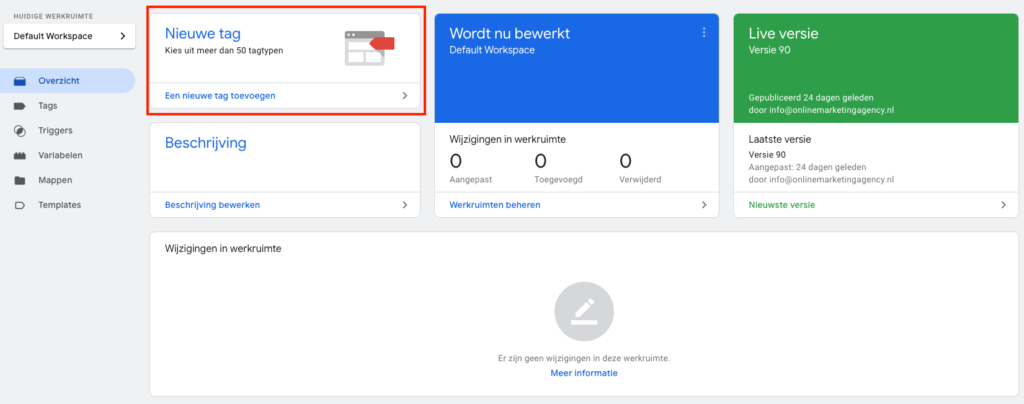
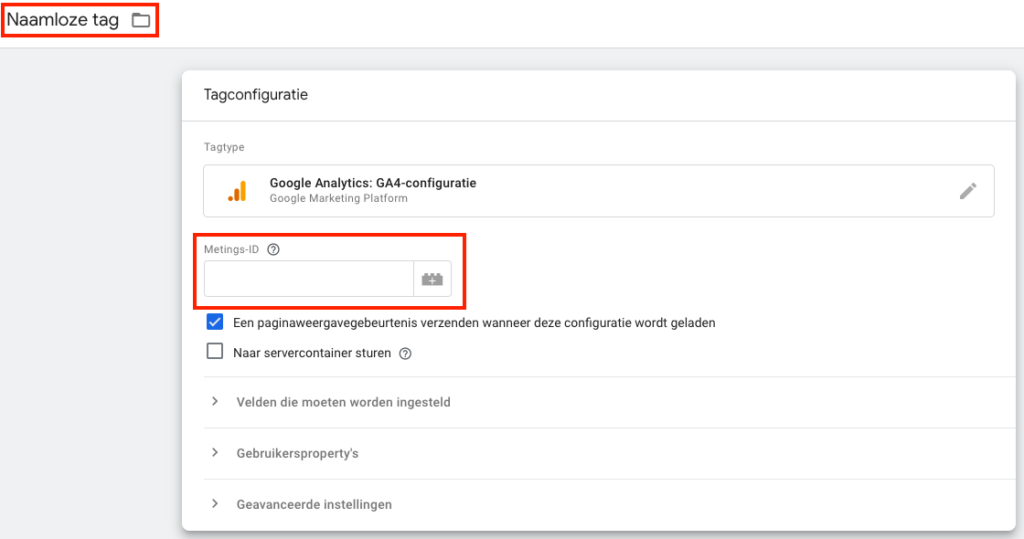
Step 3.2: On the upper left, replace the name 'Nameless tag' with 'Google Analytics 4'.
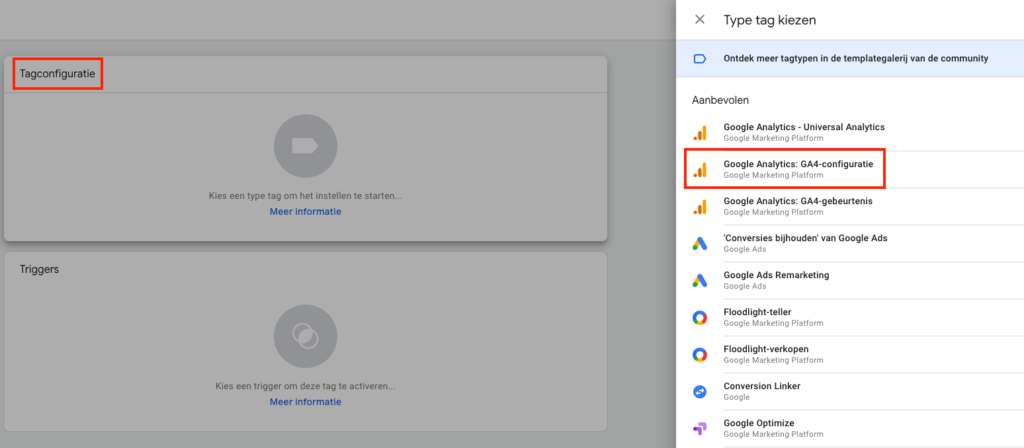
Step 3.3: Click on the 'tag configuration' area and look for 'Google Analytics: GA4 configuration' on the right side of the row and click it.
Notice! There is also a Google Analytics:GA4 event. We don't need that one.
Step 3.4: Again, replace 'Nameless tag' in the upper left corner with 'Google Analytics 4' and paste the measurement ID we saw earlier in Analytics.
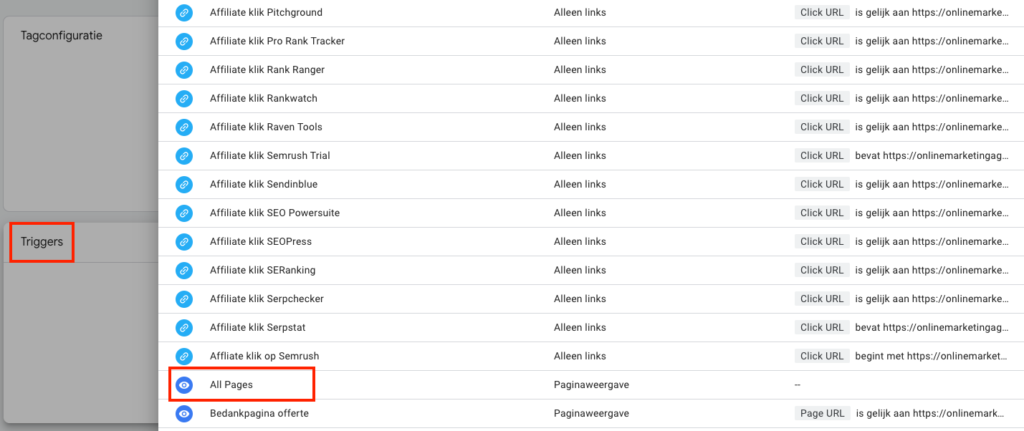
Step 3.5: Next, click on the 'Triggers' area and then click on 'All Pages'.
Step 3.6: Click 'Save' in the upper right corner .
Step 3.7: Click 'Submit' on the top right, then 'Publish' and then 'Continue'.
This is how easy it is to load Google Analytics 4 with Google Tag Manager. All you have to do now is test if it works by going to your website and checking in Analytics under real-time to see if your visit is being measured.
Bonus: Upgrading Google Analytics to Google Analytics 4 in 5 steps
Since Google wants to make it as easy as possible for those people who already have Google Analytics, it also added a feature that allows you to upgrade your current Google Analytics to Google Analytics 4.
And you do it like this:
Step 4.1: Go to the Google Analytics website and log in with your Google account.
Step 4.2: Click the cogwheel at the bottom left and then go to the account you want to upgrade.
Step 4.3: In the middle row, click on "Installation Assistant for GA4.
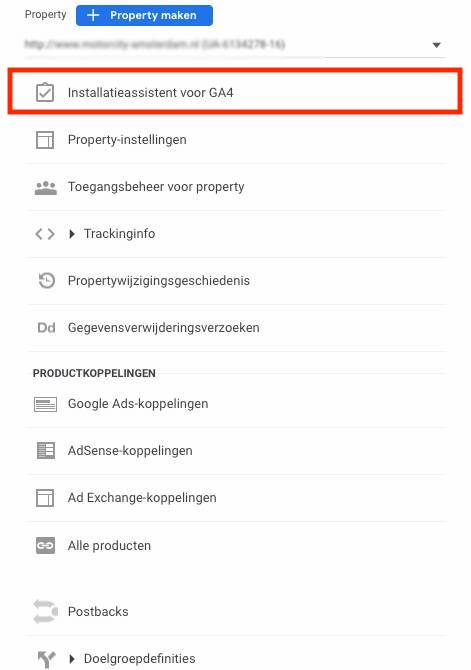
Step 4.4: Click 'Get Started', check 'Enable data collection with current analytics.js and gtag.js tags.' and then click 'Create Property'.
Step 4.5: Go to step 3.1 and repeat all steps from there with the appropriate measurement ID.
And more
Since I think you'll want more helpful tips and tutorials on Google Analytics 4, I've listed them all here for you.
- Adding someone to Google Analytics 4
- Setting up Site Search for Google Analytics 4
- Adding IP address filter in Google Analytics 4
- Click to make phone number & mail address measurable with Google Analytics 4
- Making thank you page measurable with Google Analytics 4
- Linking Google Analytics 4 with Google Ads
- Google Analytics 4 import conversions into Google Ads
- Linking Google Analytics 4 with Google Data Studio
This article was written November 18, 2020 and updated August 22, 2023.


Written by: Daniel Kuipers
Daniel is the founder of Online Marketing Agency. He constantly scours the Internet for the latest gadgets and tactics and blogs about them in understandable language. Well, sometimes.