Menu
Table of contents
Since a few weeks, the beta version is finally live and so I installed the plugin on my website and tested it fully.
So that I can tell you all about it and you don't have to discover it yourself.
Google Site Kit availability
Google Site Kit is not available under the "Plugins" heading in your WordPress back-end.
If you want to test (and thus install) the plugin, you can download it from the following two places:
Furthermore, anyone can download the plugin, you don't need special access to it.

Downloaded?
Great, now I'll explain to you how to install Google Sit Kit yourself!
Install Google Site Kit on your WordPress website
If you downloaded the plugin from either of the above two websites, you should have a zip file in your downloads folder.
Then run through the steps below:
Step 1: Log in to the back-end of your website.
You do this by typing in your website name (in my case https://onlinemarketingagency.com) followed by /wp-admin/.
Or https://onlinemarketingagency.com/wp-admin/.
Then log in there and you are in the back-end of your website.
Step 2: Click on 'New plugin' in the 'Plugins' section.
Step 3: Click 'Upload Plugin' at the top, upload the zip file by clicking 'Choose File' and then press 'Install Now'.

Step 4: Activate the plugin by clicking 'Activate Plugin'.
Google Site Kit installation process
Before you start the Google Site Kit installation, your website must first be provisioned with Google Analytics and Google Search Console.
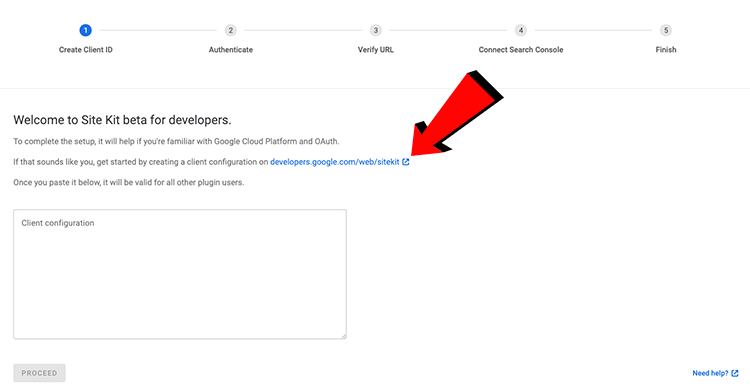
The moment the Site Kit is installed, you must first create a "Client Configuration.
You do that by clicking on the link that is on the screen: developers.google.com/web/sitekit.
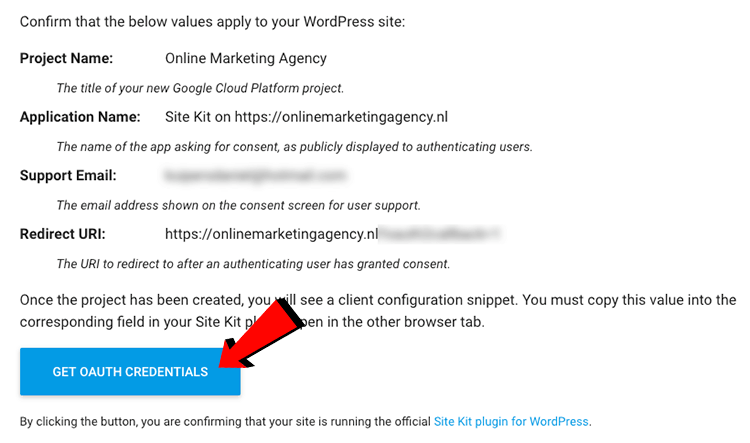
Then you have to accept the data you are shown by clicking 'GET OAUTH CREDENTIALS'.
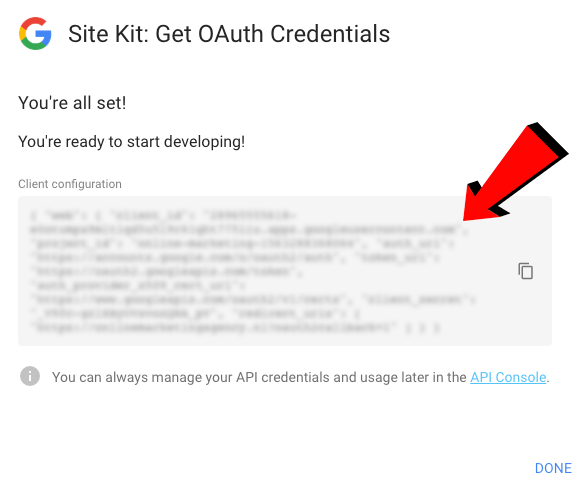
Then check "Yes" and click "Next.
Then copy the entire code you see.
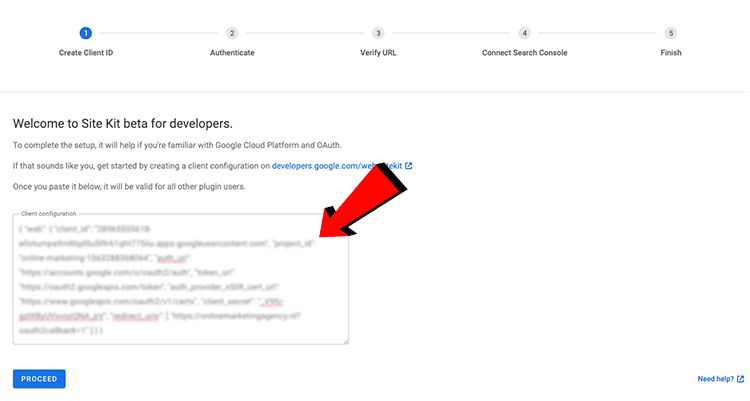
Then in step 1, paste that code into Google Site Kit in the back-end of your WordPress website.
The final steps
Steps 2 through step 5 of Site Kit configuration, are squeaky clean!
You just need to log in to the Google account to which your Google Analytics and Search Console are linked and check 2 checkboxes.
Then all you have to do is enter the URL of your website and Google Site Kit will do the rest.
Google Site Kit in use - my opinion
After going through the installation process, I immediately added Google Analytics and Google Page Speed Insights.
You can also choose to link Google AdSense, Google Optimize and Google Tag Manager, but I haven't done that (for now).
After all, I do not currently use Google AdSense and Google Optimize for my website.
And when installing the link to Google Tag Manager, something didn't seem to go quite right.
That's why I ignored them.
Back to Google Site Kit capabilities.
Within Site Kit, you can then choose from four components:
- Dashboard (here you will find all the information of the tools you have added)
- Search Console (here you will logically find all data from Google Search Console)
- Analytics (here you will find all the data from Google Analytics, duh)
- Settings (here you can delete, add, stop services and change your settings.
Since I'm sure you're curious about what that all looks like, here's a screenshot for you of the dashboard:
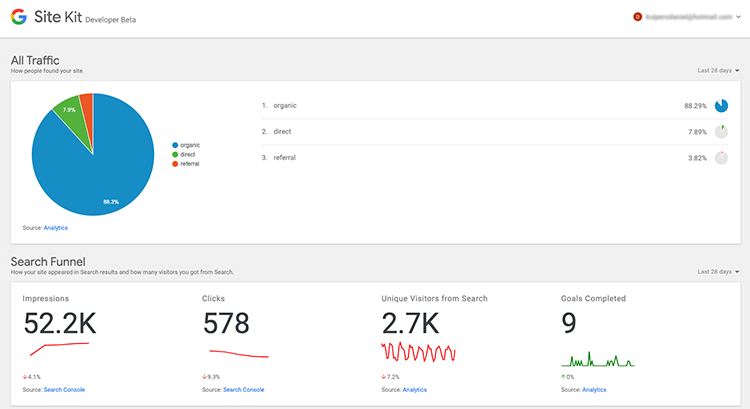
All in all, I must say that I have only grown more enthusiastic about Google Site Kit.
It looks good, works fast, is easy to install and you get to see important data such as number of conversions, visitors, bounce rate, number of clicks and number of impressions.
I have been using Google Site Kit for 2 weeks now and there are no problems I have encountered.
I am very satisfied with this new tool from Google.
And now I am very curious!
What are your experiences with Google Site Kit?
I would love to hear from you.


Written by: Daniel Kuipers
Daniel is the founder of Online Marketing Agency. He constantly scours the Internet for the latest gadgets and tactics and blogs about them in understandable language. Well, sometimes.