Menu
Table of contents
What is retargeting?
Do you want to bring in more conversions? For example, in leads or purchases? Then Meta advertising can help you do that. It is important that you use relevant target groups. The more relevant the target group, the easier it is to bring in conversions.
An example of a relevant audience is people who have already interacted with your company. After all, they have already shown interest. This is also called retargeting or remarketing. The target audience has already viewed your website before. You can present these individuals with an ad in the form of a retargeting campaign.
How can you apply retargeting to Meta?
First of all, it is necessary that you create a Meta ad account. After this, you have the option of installing the Meta pixel. This is a requirement if you want to get started with retargeting. This is a code that you place in the header of the website. You can do this with a plug-in, through Google Tag Manager or by manually adding it in the source code. The Meta Pixel tracks all website visitors so you can retarget them later.
Installing the Meta Pixel with Google Tag Manager
Using the steps below, you will have the Meta pixel installed within 15 minutes. Go to the Tag Manager account and then click on ''Tags'' in the left-hand row.

Then click on ''New.'' And give the tag a name. For example, ''Meta Pixel.''
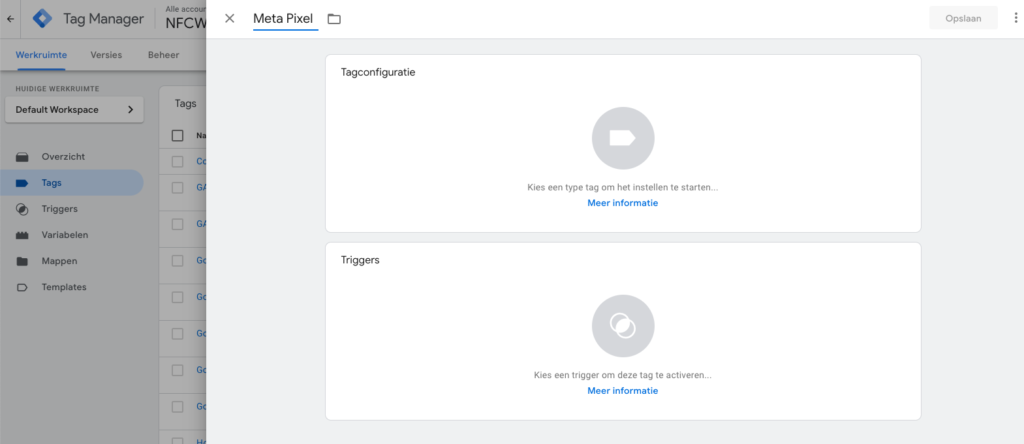
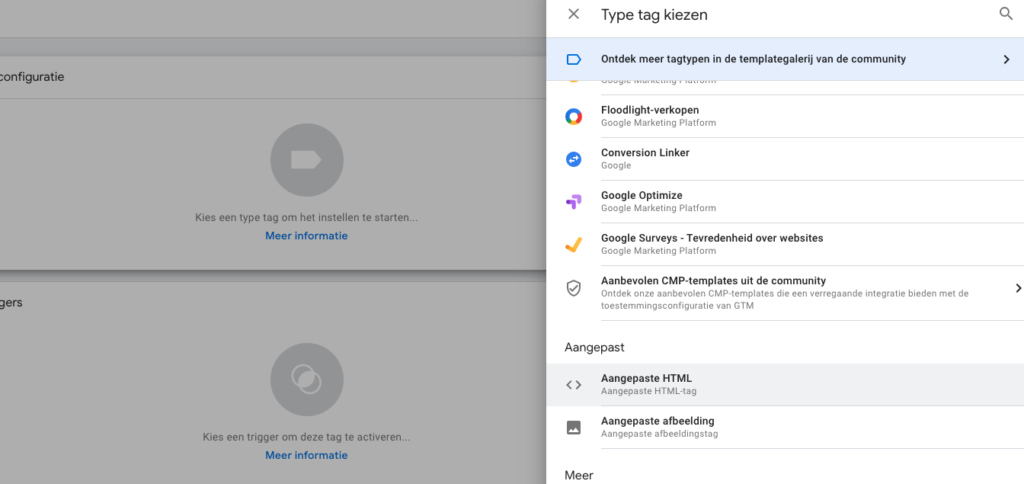
Click ''Tag Configuration'' and select ''Custom HTML''.
Next, within Meta, go to ''Event Management'' and select ''Add Event''.
Click ''Through a new website'' and select ''Install code manually''.
Copy the HTML code and paste it into the empty field within Tag Manager.
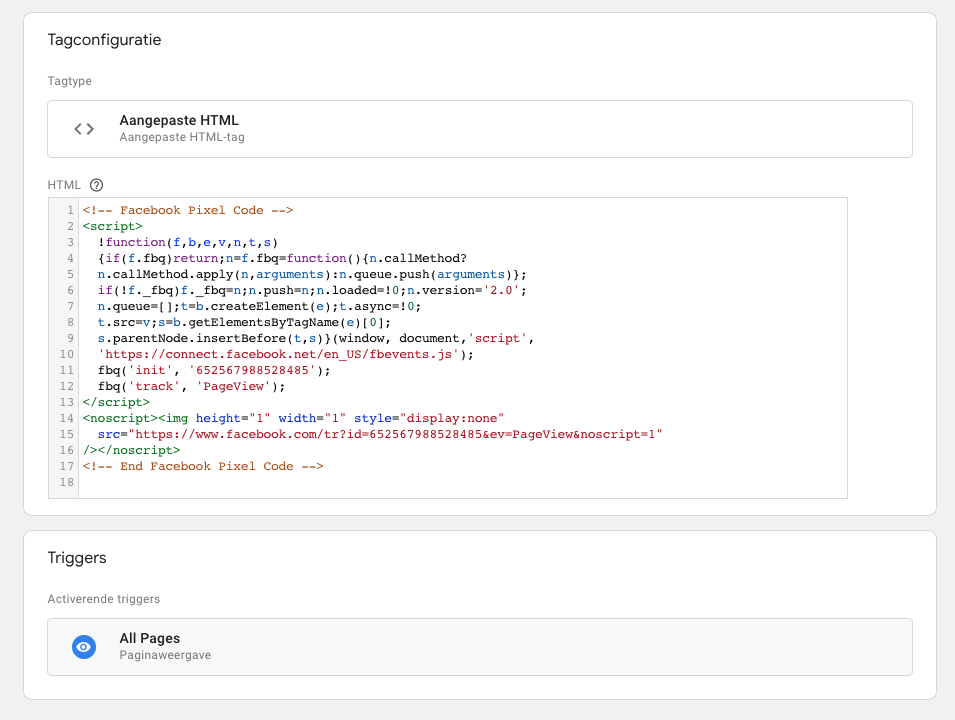
Then click on the ''Advanced Settings'' drop-down menu and select ''Once per page'' under ''Tag activation options''.
Create a trigger and activate ''All pages''.
Click on ''Create Tag.''
Then just click ''Submit'' and voila! The pixel is in the website.
Creating target groups
The Meta Pixel is installed and working. The next step is to create target groups that we want to retarget. Think of all website visitors, but also visitors who visited a specific page.
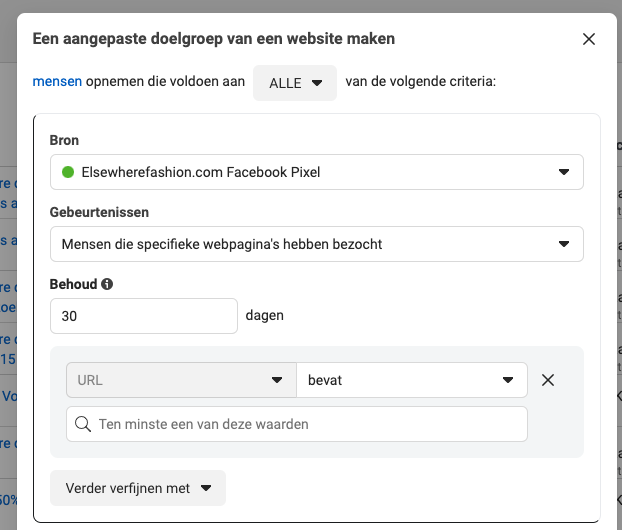
Navigate to ''target groups'' and click the blue button ''create target group''. Then choose ''custom target group.'' Under ''your sources'' check ''website'' and click ''next''. Here you can then choose ''all website visitors'' under ''events''. Give the target audience a recognizable name so you can easily find them when you are setting up the campaign.
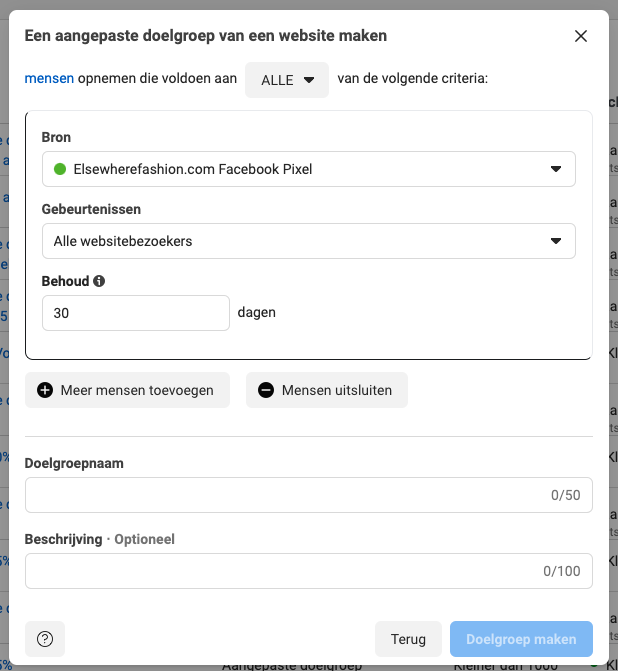
In addition, under ''events,'' you can also choose ''people who visited specific Web pages.'' Then you can then enter the URLs. All visitors who viewed the pages you can then retarget. Again, it is important that you give the target audience a recognizable name.
Set up retargeting campaign
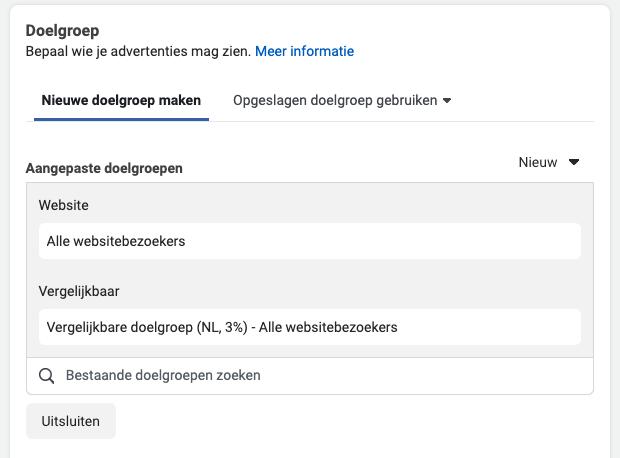
The target groups have been created. Meta will populate the target groups with visitors. The next step is to link the audiences to a retargeting campaign. This is very simple. When you create a campaign within Meta you have the option to select the retargeting target group(s) under ''target audience''. Then click ''publish'' and your retargeting campaign is live!
What are the privacy considerations when using the Meta Pixel for retargeting?
When using the Meta Pixel, website owners must comply with privacy laws, such as the AVG in Europe. This means you must inform visitors about the cookies you place and get explicit permission to track their online behavior.
How long does someone stay in a retargeting audience after visiting my website?
You can set the length of time someone stays in a retargeting audience in the Meta ad management environment. This can range from a few days to up to 180 days, depending on your strategy and the relevance of your ads.
Are there best practices for creating retargeting ads to avoid "ad fatigue"?
To avoid "ad fatigue," it is advisable to refresh your retargeting ads regularly and use different versions. You can do this by rotating different imagery, headlines or call-to-actions. In addition, you can limit the frequency in which the same user sees the ad.
How do I measure the effectiveness of my retargeting campaigns on Meta?
The effectiveness of retargeting campaigns can be measured by looking at conversion rate, cost per action(CPA) and return on ad spend (ROAS). This data is available in Meta's ad management reporting.





Written by: Daniel Kuipers
Daniel is the founder of Online Marketing Agency. He constantly scours the Internet for the latest gadgets and tactics and blogs about them in understandable language. Well, sometimes.