Menu
Table of contents
Fortunately, there is a solution to that: e-commerce tracking for your WordPress website with the plugin GTM4WP. And that's what this article is about.
This item consists of 2 parts:
- Part 1: Installing and setting up GTM4WP
- Part 2: Setting up Google Tag Manager
Let's start with part 1.
Part 1
We're going to start by installing GTM4WP. Sounds complicated, but it's only a few minutes work for which you don't need any technical knowledge.
Step 1.1: Log into your WordPress website and download GTM4WP
Log in to your WordPress website, go to the plugins heading on the left and then click 'new plugin' at the top.

Enter GTM4WP in the upper right corner, click enter and then the 'Install Now' button.
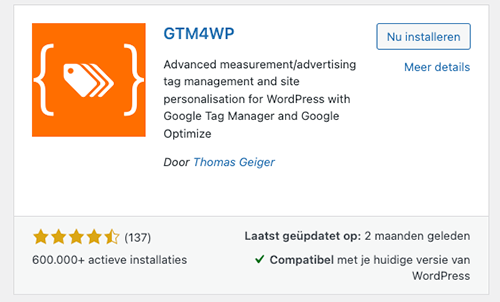
Once you have installed the plugin, the "Activate" button will appear in the same place. Click this one as well.
Step 1.2: setting up GTM4WP
The GTM4WP plugin can be found under the "Settings" heading. Once you've clicked on that, you first need to add the Google Tag Manager ID. This can be found in the upper right corner of Tag Manager.
Find it here:

And this is where you should place it:

Next, you need to set Container Code to "on. Personally, I always turn compatibility mode off, but this doesn't work equally well with every WordPress website. So test with that for a while.

Step 1.3: Actually turn on Datalayers / e-commerce tracking
In the GTM4WP plugin, click on "Integration" in the bar and then click on "WooCommerce.

To turn on GA4 e-commerce tracking, all you need to do is check the "Register enhanced e-commerce" box.
So this is the checkmark that matters:

Basically, you don't have to do anything with the remaining checkmarks and settings, but you can still turn some knobs.
For example:
- Exclude shipping costs
- Shopping cart as the first step
- Adding customer data in the datalayer
All of these options are not mandatory and are not actually important for further setup.
Before you finish, don't forget to at least click 'Save Changes'.
Well, part 1 was that simple. On to part 2.
Part 2
Your website has Tag Manager enabled, GTM4WP is set up properly, and you are now ready to set up Tag Manager.
Step 2.1: Loading Google Analytics 4 with Google Tag Manager
Loading Google Analytics 4 with Google Tag manager was so important to me that I wrote a blog about it earlier: https://onlinemarketingagency.com/handleidingen/google-analytics-4-inladen-tag-manager/.
Step 1 of Part 2 is therefore to follow that article and then come back to this one.
Step 2.2: Import GA4 container template
E-commerce tracking consists of 2 major components:
- Making sure there are datalayers (the plugin GTM4WP takes that out of your hands)
- Ensuring the data is extracted from the datalayers with Tag Manager and shot into GA4
Point 1 is solved by setting up the plugin correctly (we already did that). Point 2 is solved by importing the file below into Tag Manager:
Once you've downloaded the file, go to your Google Tag Manager account. From there, click 'manage' and then 'import container'.
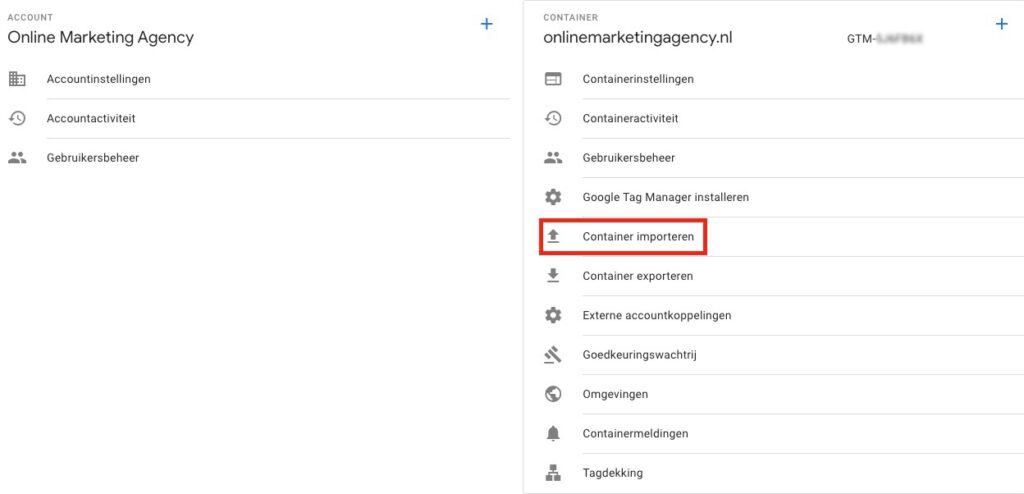
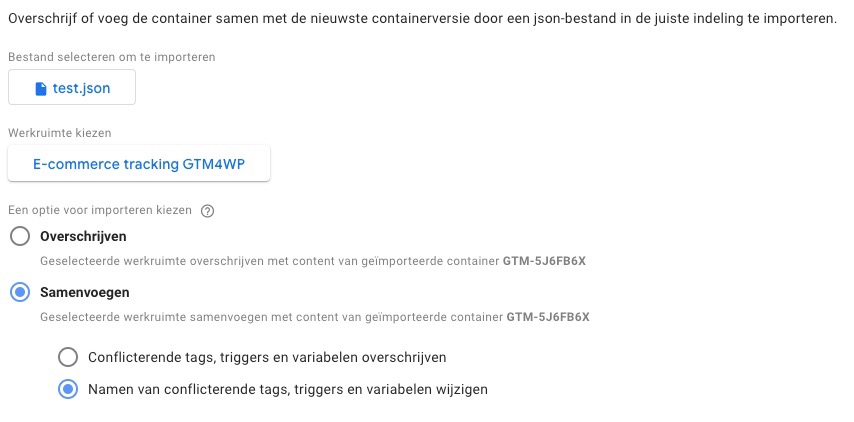
Click 'Choose container file' and upload the file you just downloaded there.
Next, choose a new workspace. For example, name it "E-commerce tracking GTM4WP.
Then choose the "Merge" option.
And lastly, choose "Change names of conflicting tags, triggers and variables.
That will look like this:
Now you may be wondering what you just did.... Well, you've just loaded a ready-made solution that causes all variables to be prepared in Tag Manager.
These are all the variables that GTM4WP creates that are in your datalayer. These are all the variables you want to see reflected in GA4.
- Ecommerce:
- Ecommerce Items
- Ecommerce Transaction ID
- Ecommerce Value
- Ecommerce Tax:
- Ecommerce Affiliation
- Ecommerce Shipping
- Ecommerce Coupon
- Ecommerce Currency
Step 2.3: Make sure GA4 is linked to the GA4 purchase event
Because you ran the above import, you should also now see an additional tag in Tag Manager. Namely:
GA4 - Event - Ecommerce Events
It is very important that you click it and then at configuration tag add the GA4 tag still. If you do not do this, the implementation will not work.
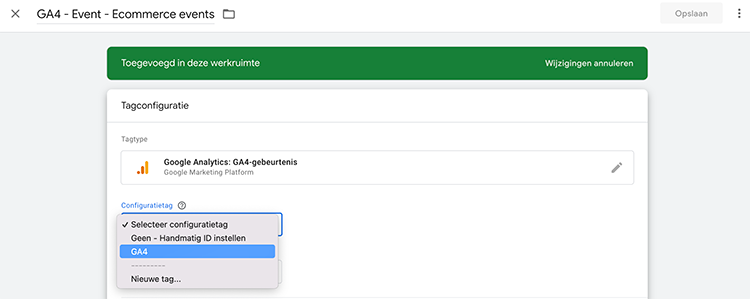
Once you've done that, then click save at the top right.
Then click submit at the top right to publish your Tag Manager container.
Step 2.4: Make sure it works
We have arrived at the final step. GTM4WP is up and Tag Manager is set up properly. The important thing now is to go to GA4 and go to the 'Realtime' report.
Next, do a test order. If everything went well, you should see a 1 at purchase. That will look like this:
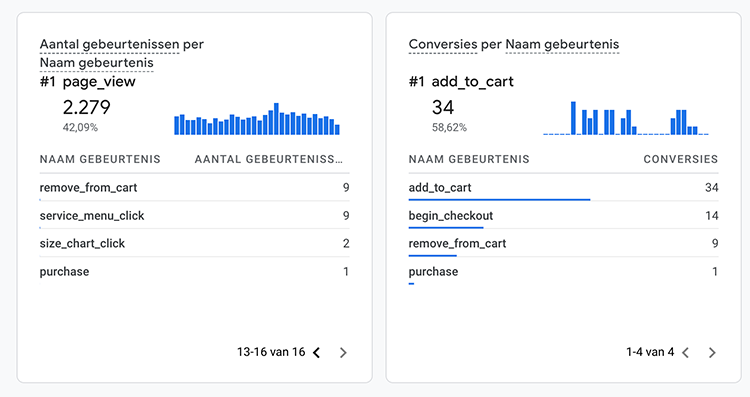
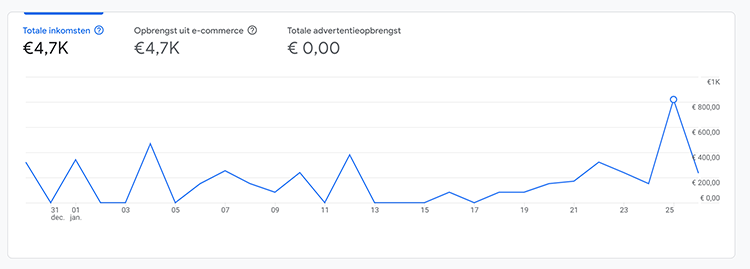
Then, the next day, you need to see if the revenue is also reflected under the revenue generation heading.
If that's the case, you can be sure your e-commerce tracking is set....
Then now is the time for a pat on the back ;-)!
What is the benefit of using the GTM4WP plugin for e-commerce tracking?
The biggest advantage of using the GTM4WP plugin is that it easily enables e-commerce tracking for WordPress websites without the need for technical expertise. It eliminates the need for manual coding or complex integrations and provides a streamlined way to track datalayers and e-commerce events. Moreover, it is compatible with Google Analytics 4 (GA4) and Google Tag Manager, ensuring seamless reporting and tracking.
Are there other plugins similar to GTM4WP that I can consider?
Yes, there are other plugins that can offer similar functionality, such as "Enhanced E-commerce for WooCommerce store" or "WooCommerce Google Analytics Integration." However, GTM4WP is often preferred because of its extensive integration with Google Tag Manager and the flexibility it offers in terms of data layer configuration.
What should I do if my e-commerce tracking doesn't seem to be working correctly, even after following all the steps?
If you are experiencing problems with e-commerce tracking, follow these steps:
- First, make sure that all settings in both GTM4WP and Google Tag Manager are correct.
- Make sure you have the most recent version of the GTM4WP plugin installed.
- In Google Analytics 4, see if data is being reported correctly.
- If you are still experiencing problems, consider seeking help from a specialist or a community forum on the subject.
Can I also use GTM4WP for websites not built on WordPress?
No, GTM4WP is designed specifically for WordPress websites. If you have a site built on another platform, you should look for alternative plugins or solutions specific to that platform.





2 Responses to "Set up e-commerce tracking GA4 with GTM4WP WordPress plugin - no developer needed"
Dear Daniel,
There has been an update from Tag Manager that no longer allows you to associate a configuration tag at Step 2.3. You only get an option for a measurement ID. Do you happen to know how you can still link everything together properly?
Thank you very much in advance.
You can now use the Google Tag!