Menu
Table of contents
Do you also get multiple spam emails daily from annoying males trying to sell you something? From people saying you've won something? Or just from strangers who apparently think you're really sweet?
Then chances are your form is not properly secured and spambots can automatically fill out your form without any problems.
To prevent that, you can use the Google reCAPTCHA. That's nothing but a piece of clever software that keeps those spambots from doing their job.
In this article, I'll explain how to request and set up the reCAPTCHA on your WordPress website.
Step 1: Register Google reCAPTCHA site and create keys
Before you can create the reCAPTCHA keys, you must first register your website with Google. You can do this by going to the following website: https://www.google.com/recaptcha/admin/create.
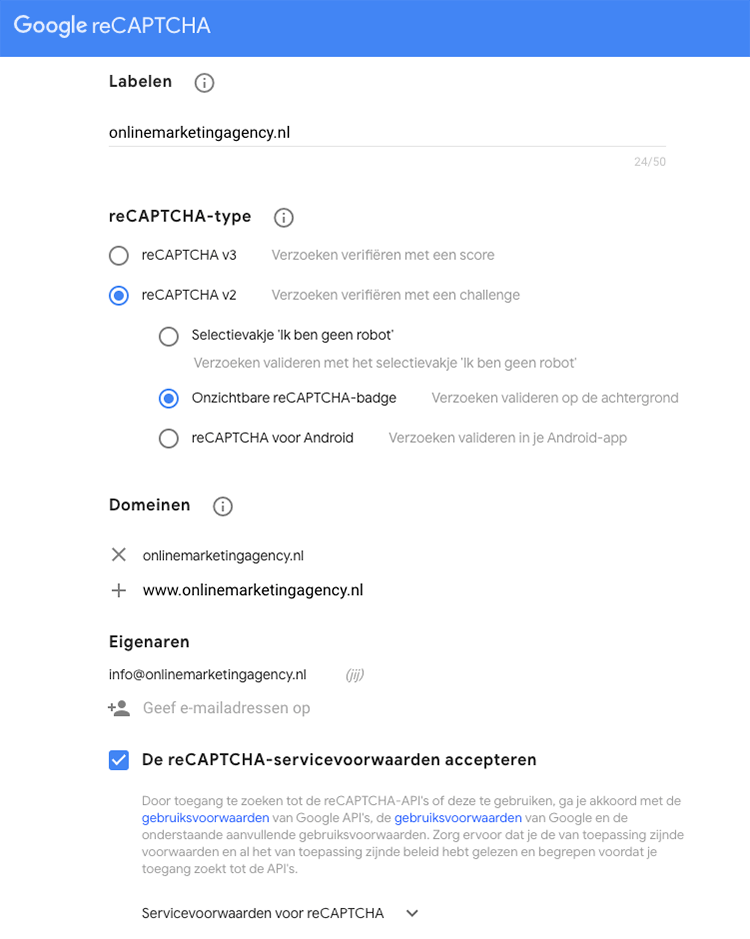
Here you need to click and fill in the following information:
- Labeling: enter the name of your website here
- reCAPTCHA type: check here which reCAPTCHA you want. We almost always choose v2 and then the invisible variant. This is because it has the least impact on conversion.
- Domains: enter the www and non-www variant of your website here
- And check "accept the reCAPTCHA terms of service.
That would look something like this:

Then click "Submit.
You will then see a screen with the reCAPTCHA keys. Copy both keys, because you will need both of them.
Step 2: enter reCAPTCHA keys in the settings of your WordPress forms plugin (Gravity Forms)
By now, almost every forms plugin within WordPress has a feature built in to make use of the reCAPTCHA. In this example, we are using the 'Gravity Forms' plugin.
After all, that's our favorite WordPress forms plugin.
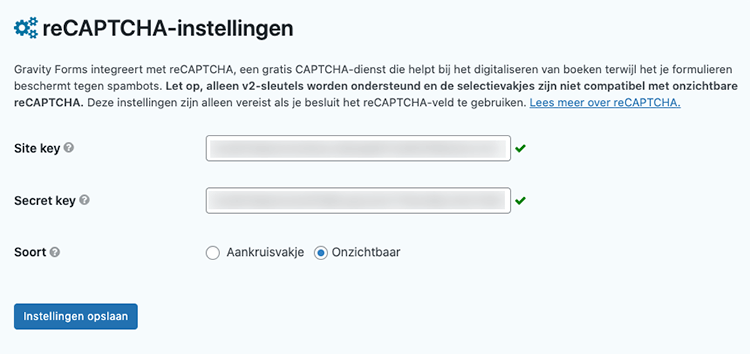
If you are logged into WordPress, you need to click on "Forms" on the left and then "Settings. Then scroll all the way down and enter both keys there.
Also make sure you check the right kind. In our case, we chose the invisible keys. Therefore, in our case it is on (see below).

Step 3: Customize form
The reCAPTCHA keys are now added in your WordPress plugin, but that doesn't mean they already work on all your forms.
Before that, you also have to add them manually for each form. And that's what we're going to do now.
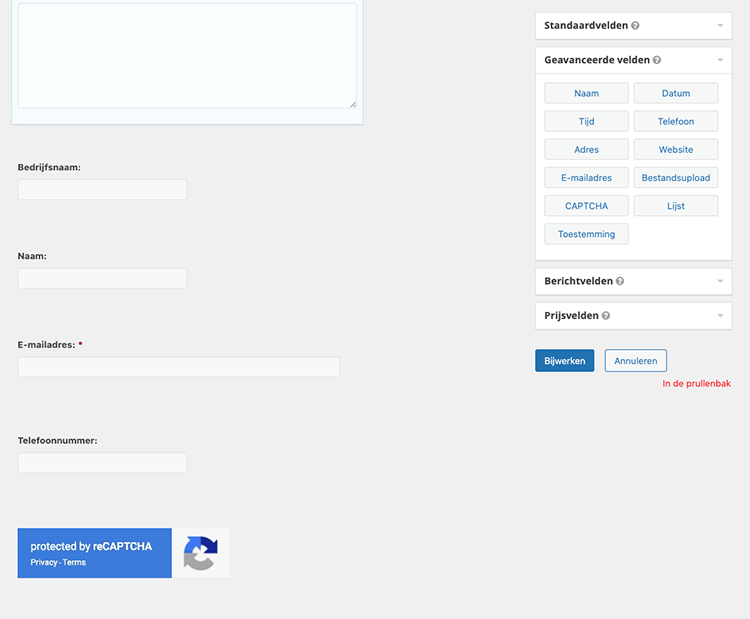
In your WordPress environment, go to "Forms" and then click on your form.
On the right, open the 'Advanced Fields' block and drag the CAPTCHA at the bottom of your Gravity form.

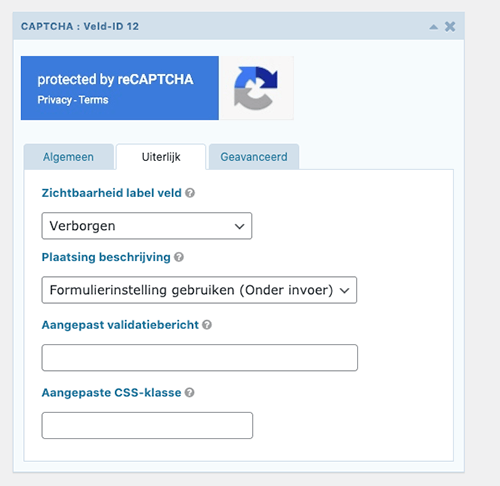
Then click on the CAPTCHA block to set it up. If necessary, adjust the theme, the position of the badge and very importantly, set the visibility to "Hidden.

Then right-click 'Update' and your form is saved. Then repeat step 3 for all your different forms.
Step 4: Testing to see if it works
Since your forms are incredibly important (something to do with leads and new customers), you need to properly test that all your forms are still working. Take a moment to do that on mobile, desktop, wifi and on 4g.
Then you can be sure you still get everything in.


![Technical SEO: 11 tools for greater insight [Free & Paid]](images/technische-seo-11-tools-voor-meer-inzicht.jpg)

Written by: Daniel Kuipers
Daniel is the founder of Online Marketing Agency. He constantly scours the Internet for the latest gadgets and tactics and blogs about them in understandable language. Well, sometimes.